December 2015
Along with the purchase came a 1995 Ford 8.8 Rear Differential. It is with disk brakes, but without ABS. It has a ratio of 3.08. The differential cover is damaged, so it will need to be replaced. As of 12/2015, the plan is to keep it as it is right now. I will open it up, and try to inspect some of the important components. But the suggestion was made to run it for 1,000 miles and see what happens.
I will clean it up, change the oil and modifier, change the gaskets, and some other small items. I'll be putting on the 15"x9" Halibrands that will have a 275/60 R15 mounted on the wheel. I'm hoping that this tire will be fine on the wide axles.


---------------------------------------------------------------------------
Taken from Jan 1st Post
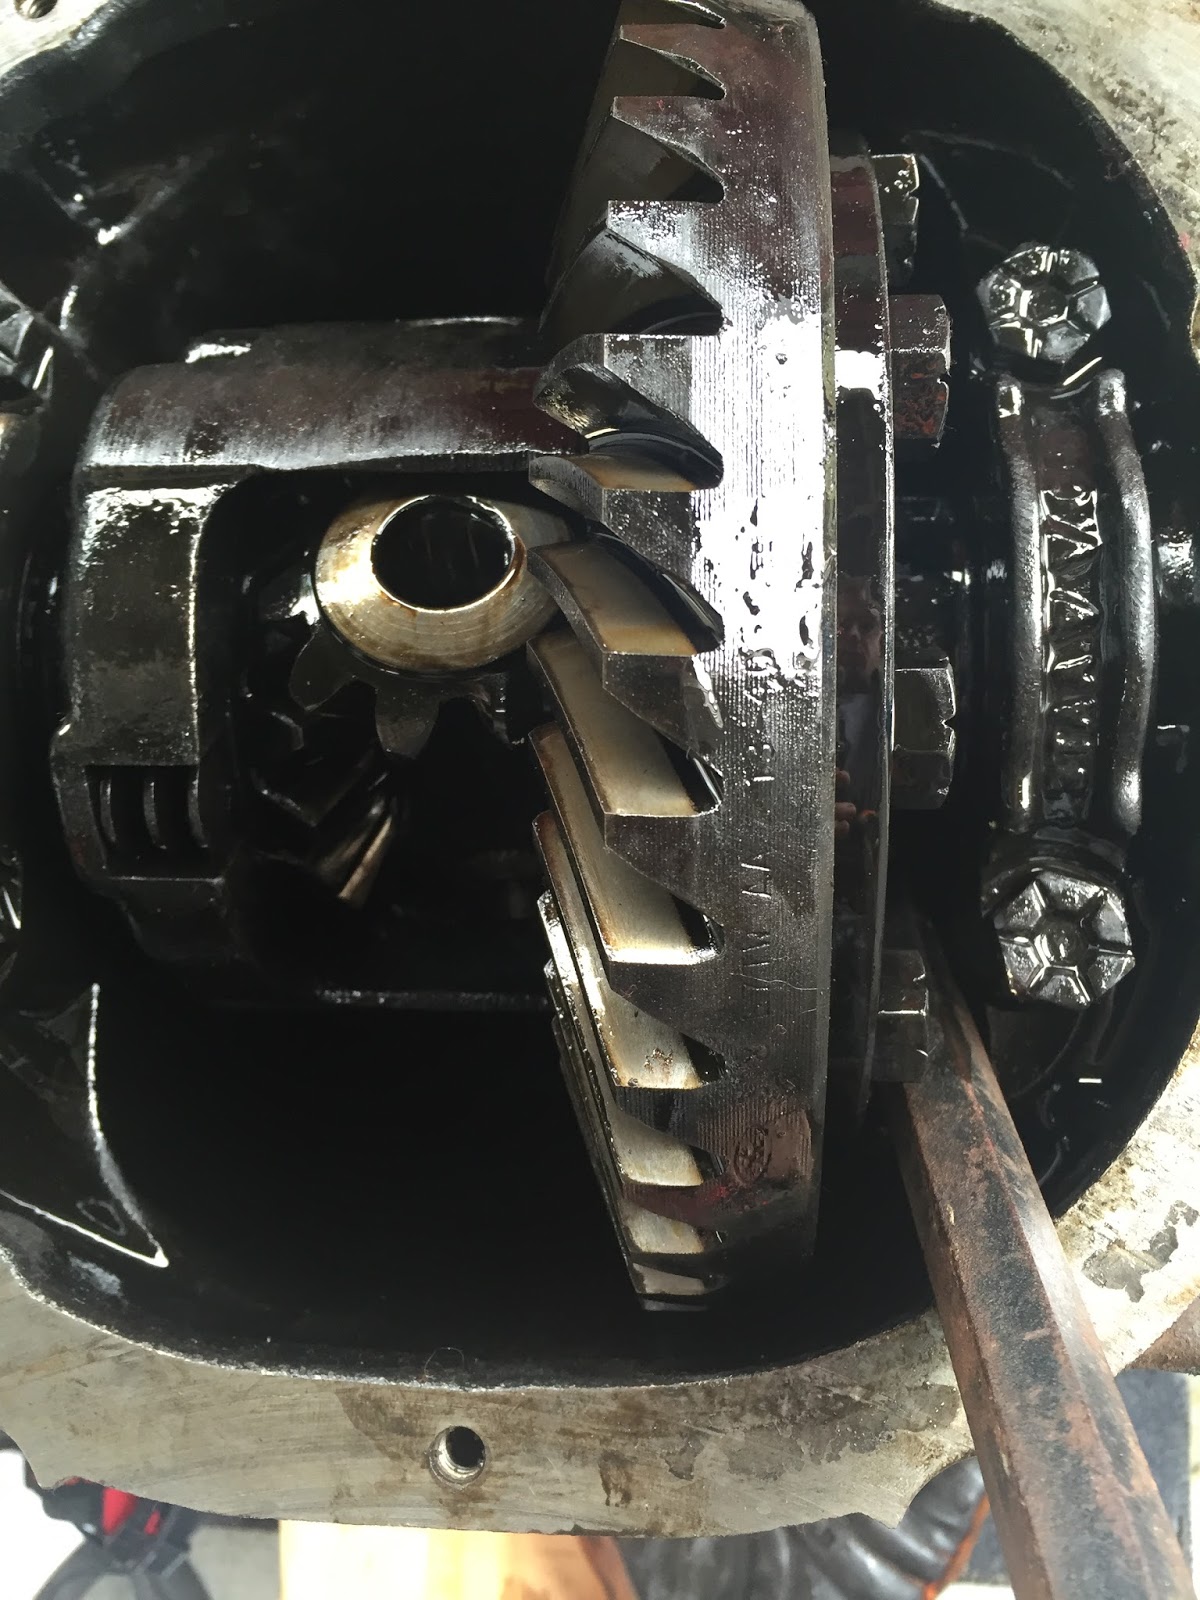
Today I opened up the 1995 8.8 rear end that I received with the purchase. It has the 3.08 rear ratio and a dented differential cover. I've never opened up, or seen inside the rear differential before. It was pretty interesting to see.


First, I used a 1/2 socket to remove the 10 bolts that hold on the cover. Then pried up the cover with a flathead to reveal the gearing inside.

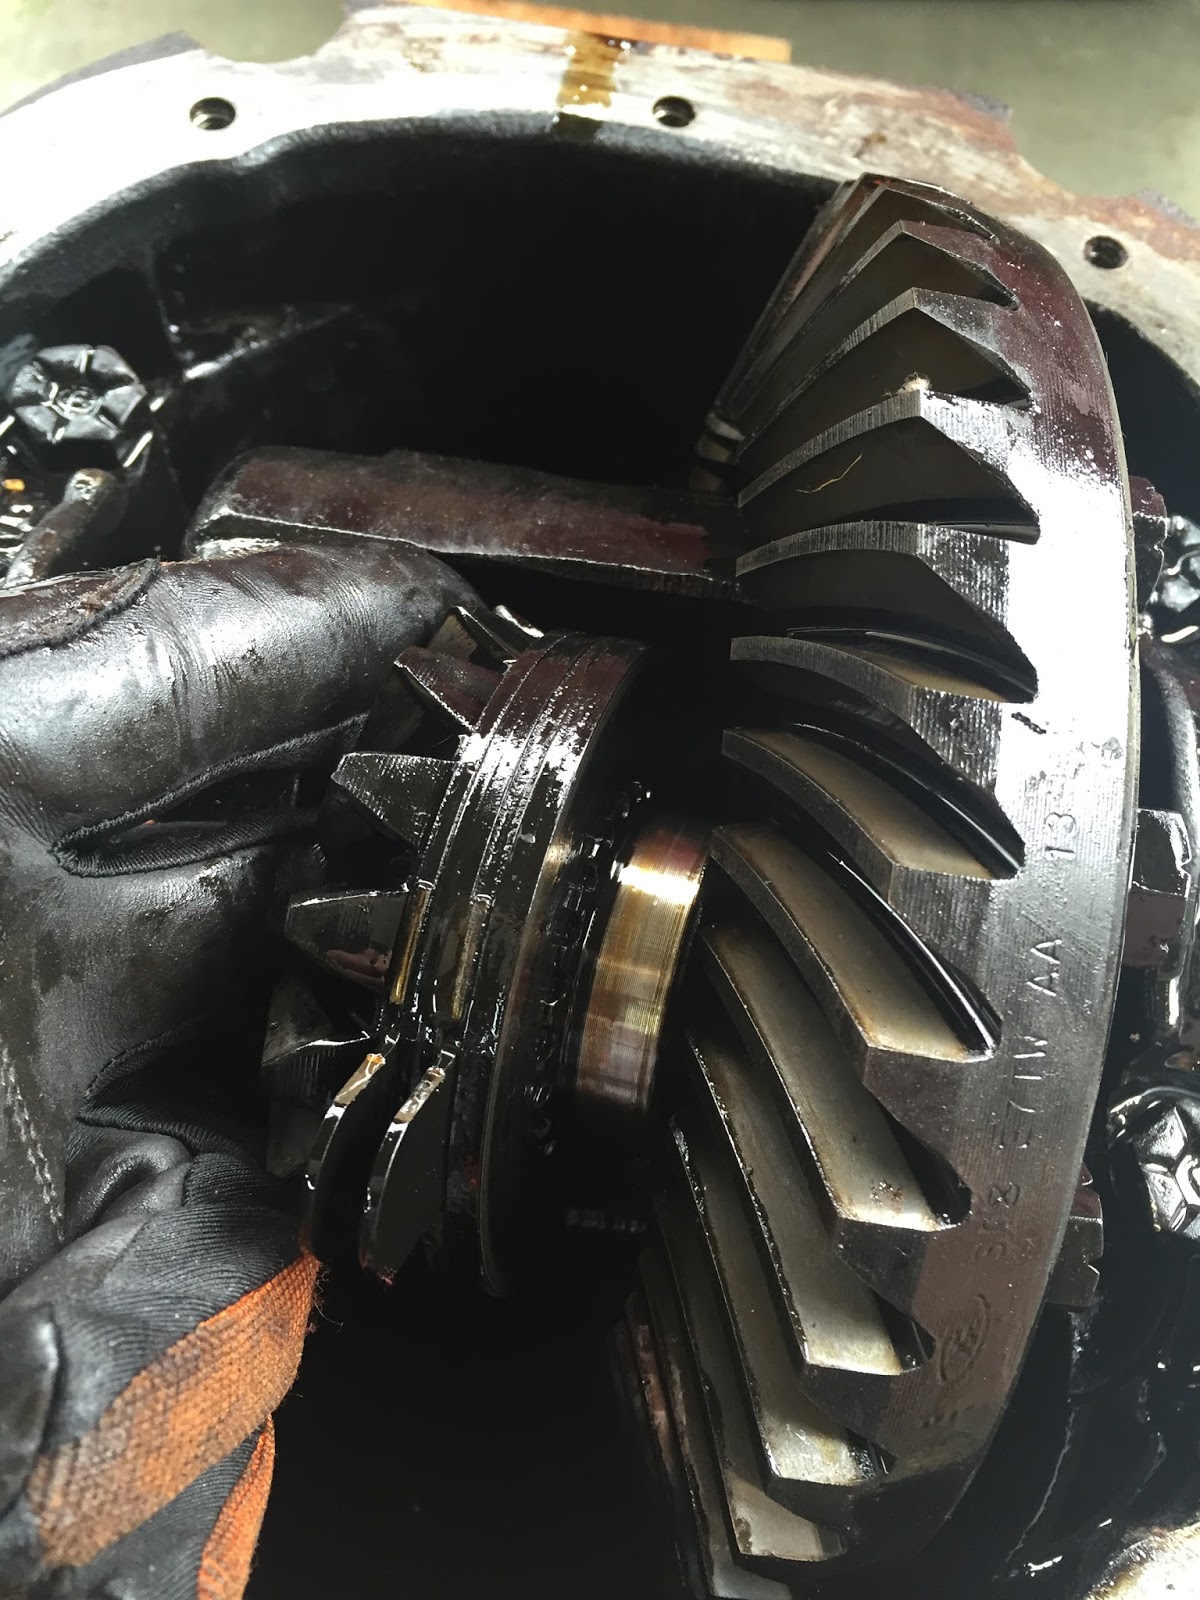
I ran through a 360 degree turn of the differential to take a look at the gearing.
-----------------------------------------------------------------------------------------------------------
Taken from Jan 5th Post
A lot of work needs to be done on the rear end that I received with the purchase. A few of the suggested items are:
1. Change out Traction Lok kit
2. Clean grease off of axle tubes, and prepare for POR-15
3. Weld tubes to pumpkin to ensure that the grease leak wont continue
4. Weld the banana bracket
5. Paint on the POR-15
6. Replace diff cover with fasteners
7. Change brake lines
8. Change Brake hoses
9. Reinstall Calipers


-------------------------------------------------------------------------------------------------------------
Taken from January 8th Post
Alright, let's start to get this rear end ready for install. This thing really needs to be cleaned.

As I'm starting the cleaning, I immediately see that there is grease and oil coming from the pumpkin. It was suggested on the forum that I could weld the pumpkin to the tubes. I think I'll do that.

So first, I'm going to clean the rear end, and I am using brake cleaner to help. It really did a good job.

I took off the brake lines and hoses so that they will be replaced.

I had to use a cheater to get the bottom bolt loose that was holding the center brake hose bracket.

Then a torx bit to get the driver and passenger side brake hose brackets off of the axle.

I am using the Gunk Degreaser to clean all of the oil and grease off of the axle. This does a fantastic Job.

Now time to weld the axle. Spot welds that were on opposite sides of the axle were done first so that too much heat wasn't applied to one side to promote warping. After the spot welds, 1"-2" welds were done on opposite sides of one another in the same way, until finally the entire tube was done.


Unfortunately, that new weld now interferes with the the 3 link Banana bracket. Figures.

So now I need to grind off the new weld radius.

Now it's ready.

But the Banana bracket still doesn't sit well. The weld on the side is now interfering. So that needs to be off too.


Finally, the bracket is getting snug against the axle and pumpkin.

Making sure that the bracket is perpendicular to the axle.

Once the bracket is perpendicular, I punched a hole to know where to drill the support bracket in the pumpkin flange.

After providing spot welds on the banana bracket to hold in place, I couldn't get the bolts through the two halves of the bracket very easily. I tried drilling with a 1/2" bit, but the bolts still wouldn't go in easily. I finally took an end mill (1/2") and put that into the drill. Now the bolts go in easily and free.

I had 1/2" bolts in place as I spot welded the small half of the banana bracket to the axle.

I think I'm ready to move to the next step.

--------------------------------------------------------------------------------------------------------------------------
Taken from Jan 9th Post
I was going to head on down to the Ocala, FL car show today. I got up at 5:45am, took a shower and was going to be out the door by 6:15am for the 4 hour drive. But while I was in the shower, I was thinking about what I was able to get done last night, and I wanted to continue. This was a wide open Saturday and I really had more interest in continuing with the build. So I stayed, and went down into the garage.
Here is the to do list that I made for myself :

It's a little chilly this morning (well, it is January), and the smell of gear oil is not a good smell. So I'll be doing this outside the garage.

Drained the rear end.


Then I rotated the axle ends until the differential pinion shaft lock pin shows up. I found that this needs to be removed with an open end wrench because there wasn't enough room to remove the socket when taking the pin out.

Now remove the pin itself.

This will allow you to be able to push in the axles so that you can remove the U-washer. I wasn't sure what I was really doing, and I rotated the axle to see the pin. Next thing I heard was the pin dropping into the depths of the differential. On the other side, I didn't rotate the axle, I just pushed in and removed the U washer.

Reomoving the axles, you can see where the bearing rides the axle. It's the clean machine mark on the the right.


Now take out the S shaped spring. I removed this with some vice grips to get good traction on the spring.

Once that was out, I was stumped. How do I get the spider gears out? They are the two gears that are located at the 12 and 6 oclock position (3 and 9 oclock in the video). looking at a few youtube videos showed these guys just quickly removing the gears. But they wouldn't move for me. Finally I ran across a note that you rotate the axle, and the motion will move the gears into the removal location.
Watch this little video I made
Notice the crow bar in the right of the photo. I used that to hold the big gear in place as I rotated the axle end. Now I can reach the spider gears, and removal was easy. You need to make sure that you keep the washer that is on the back of the gear. Also, the gear that you see on the top is easy to remove, but you need to reach your hand down in the diff case to get the other one. It's not hard at all. I just found that you can't rotate it up to the top.
Now that those are out, just reach inside and get the gears with the traction lok plates. Be sure to keep them on the same side as removal. The shims may be different thicknesses.
Also, after removal, I did notice that one of the clutch plates was still inside the diff case. I used a flat head to make sure that all of the items were out. On one side I still had the shim plate, and on the other, I still had a clutch plate and shim plate still inside. If the last thing you remove is the thin shim, then you got it all.

Below is the kit. It came with one bottle of Modifier, 6 clutch plates, 8 steel plates, a new lock pin, and 6 steel shims.

this is a close up of the clutch plates. ( I think that term is correct)

You're to soak the clutch plates in modifier before install. WOW, that is a strong smell. I thought the gear lube was bad, but this is really bad too.

Over view shot of work so far. Notice that I have the gears on their respective sides of removal. It doesn't matter about the spider gears. Just the gears that have the traction lok plates.

Here is the order of the disks that I removed. I am going to put in the identical set up. There are plenty of people to tell you to do a different arrangement. But for me, I just want to match OEM. So, from the top of the photo working down: steel shim, clutch plate, steel plate, steel plate, clutch plate, steel plate, steel plate, clutch plate, gear.


I used the dremel to clean off the old gasket material off of the differential. Just use it lighly.

Here is my new differential cover. I wasn't really interested in the chrome, but it was inexpensive, and I thought I'd try it. It's only a cover. It came with a gasket and 10 new bolts.

Also used the dremel to clean off the driveshaft mounting plate.


Now would be a good time to use the POR-15 to spray on the rear end. Items are removed, and it's easy to get around the rear end.


It looks a lot better.

I have some pitting on one of my axles. This may be an indication that I need to change out a bearing in the rear.
Some of the guys on the forum recommended an Axle saving bearing. Because the axle itself acts as the inner race of the bearing, you can move the bearing to a different location on the axle and contact a new surface area. It's about $35 for each end.

Now to stack the new plates on the gear. The RH side of the rear end has a 0.035" shim.

The LH side of the rear end has a 0.040" shim.

The steel plates are 0.080". This matches the ones I took out.

The clutch plates are about 0.097". This also matches the ones I took out.

New plates are stacked up, and ready for install. All of them have been covered with plenty of lube before install.

Install complete. Just need to install the S spring and then the pin. I learned a couple of things on the reinstall. One, that S spring is a bear to get back in. I finally got one corner inside, then used a hammer to beat it in the rest of the way. But then I couldn't get the pin to install because I didn't line up the spider gears with the casing correctly. I had to remove the S-spring so that I could rotate the spider gears into the proper location. Then, I had to reinstall the S spring again. This time, I had hammered it in too far, and the pin was hitting the spring. After some monkeying around, I got it installed.
I didn't install the U washer or pin bolt yet, because I am going to replace the axle bearings. This will just save me a step when removing the axles later this week.

---------------------------------------------------------------------------------------------------------------------
FROM JANUARY 11TH POST
I Picked up some Axle bearings and axle seals from Napa during lunch today. Pretty cheap. I expect this job to be short tonight.

And Dan McC was nice enough to let me borrow his Bearing puller kit. He was also very generous in giving me an axle that he had from his '96 Cobra. Thank you, Dan.


Since I left the u washers out of the axles from Saturday, they just slid right out. I left the differential cover on right now to prevent unnecessary smells. :)
First was pulling out the seal. This was harder to do that I thought that it would be. I used a cheater bar to help.
Take a look at the video. I'm shaking trying to get that thing out.


Now to get the bearing out. First, make sure you have the correct size for bearing removal. I did this by taking the new bearing and see how the puller fit against it. Then when you have the right size, enter it into the axle tube passing through the bearing itself. Pull back out until you feel the puller butt up to the bearing. Then thread the jam nut and washer against the outside of the bearing.

This puller was very handy, and is almost necessary. My daughter got in on the build and helped out.
Now that the bearing is out you can see how each piece was against an opposite face to help out with the removal.

Looking inside the axle tube.

To put the new bearing in, I lubed it with gear oil, and mounted it just as we removed it. Then took a rubber mallet and lightly hammered it in. It was a good install method.

Now, of course, I had one bolt that didn't want to cooperate on Saturday, so now was a good time to make sure the threading was clear. I then took off the cover to get to the internals again.

And I removed the center pin from the pumpkin, so that I'd be able to reinstall the u washers into the axle ends. You can see the axle end pushed in against the S spring showing where to slide on the U washer. I did this for both sides. Fortunately, it was uneventful.

I gently hammered the center pin back in place, while making sure I had the correct end to line up with the pin lock hole. This just took a careful approach, but was worth it.

Installed the lock pin (easily I might add), and snugged it up tight, but not overdoing it.

I put some gasket sealant on the machined surface.

Filled with 2 bottles of lube and one bottle of modifier.

Then buttoned her all up with the new cover. I wasn't really expecting the chrome, but that's okay. It'll work.

---------------------------------------------------------------------------------------------------------------------
FROM JANUARY 12TH POST
Little A and I checked the torque on all of the bolts that haven't been done. I went back and forth on that banana bracket quite a few times until all four bolts were torqued. Little A was very helpful.

She made sure that the locktite and torque paint were applied to each bolt. She even helped make the torque wrench click at 82 ft-lbs by standing on the wrench.


Now it is time to roll the rear end under the car. I had the hardest time connecting the lower control arms to the frame (I had removed them from the frame earlier thinking that it may help having them start on the rear end). I would jack up the rear to help with the install. Finally, I was able to get a bolt through each lower control arm to hold in place.
But what I didn't know, is that the axle tube on the DS should be ABOVE the hard pan brace, not below. I have this thing all jammed up trying to insall it. I didn't realize my mistake until I was hooking up the PS shock and having problems. I couldn't get the bolt to pass through the shock mount. I decided to go back to the DS to see if I could get that side mounted. The DS of the car is where it was hitting the frame.
That's when I knew I was wrong in my mounting location. I need to take it all down and try again.


But that's not for tonight. I better do that when rested.
NOTE: JAN 13th: I was able to release the rear end from the frame. I'll try to remount on the 14th.