I Picked up some Axle bearings and axle seals from Napa during lunch today. Pretty cheap. I expect this job to be short tonight.
And Dan McC was nice enough to let me borrow his Bearing puller kit. He was also very generous in giving me an axle that he had from his '96 Cobra. Thank you, Dan.


Since I left the u washers out of the axles from Saturday, they just slid right out. I left the differential cover on right now to prevent unnecessary smells. :)
First was pulling out the seal. This was harder to do that I thought that it would be. I used a cheater bar to help.
Take a look at the video. I'm shaking trying to get that thing out.

Now to get the bearing out. First, make sure you have the correct size for bearing removal. I did this by taking the new bearing and see how the puller fit against it. Then when you have the right size, enter it into the axle tube passing through the bearing itself. Pull back out until you feel the puller butt up to the bearing. Then thread the jam nut and washer against the outside of the bearing.
This puller was very handy, and is almost necessary. My daughter got in on the build and helped out.
Now that the bearing is out you can see how each piece was against an opposite face to help out with the removal.
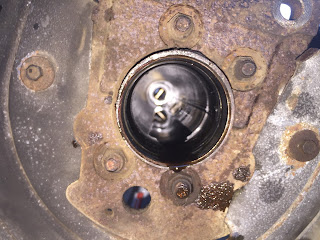
Looking inside the axle tube.
To put the new bearing in, I lubed it with gear oil, and mounted it just as we removed it. Then took a rubber mallet and lightly hammered it in. It was a good install method.
Now, of course, I had one bolt that didn't want to cooperate on Saturday, so now was a good time to make sure the threading was clear. I then took off the cover to get to the internals again.
And I removed the center pin from the pumpkin, so that I'd be able to reinstall the u washers into the axle ends. You can see the axle end pushed in against the S spring showing where to slide on the U washer. I did this for both sides. Fortunately, it was uneventful.
I gently hammered the center pin back in place, while making sure I had the correct end to line up with the pin lock hole. This just took a careful approach, but was worth it.
Installed the lock pin (easily I might add), and snugged it up tight, but not overdoing it.
I put some gasket sealant on the machined surface.
Filled with 2 bottles of lube and one bottle of modifier.
Then buttoned her all up with the new cover. I wasn't really expecting the chrome, but that's okay. It'll work.


No comments:
Post a Comment